Archery Bows – How to Choose the Right One
Understanding Archery Equipment: Bows, Arrows, and Accessories
When delving into the world of archery, it is crucial to comprehend the core equipment: bows, arrows, and the myriad of accessories that can enhance your shooting experience. Let’s start with archery bows.
Archery Bows
Bows come in various styles, each suited to different archery disciplines and skill levels.
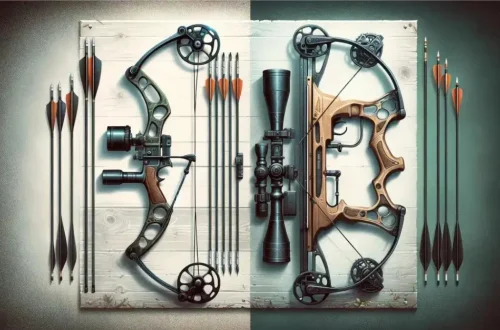
- Recurve Bow: Named for its distinctive curved tips, which turn away from the archer, the recurve bow is a favorite for both beginners and Olympic athletes due to its balance of power and control.
- Compound Bow: Utilizing a system of pulleys and cables, compound bows offer a mechanical advantage, allowing for greater accuracy and reduced draw weight, making them ideal for hunting and sport shooting.
- Longbow: As the traditional bow of medieval Europe, longbows are characterized by their long, straight limbs and are appreciated for their simplicity and historical significance.
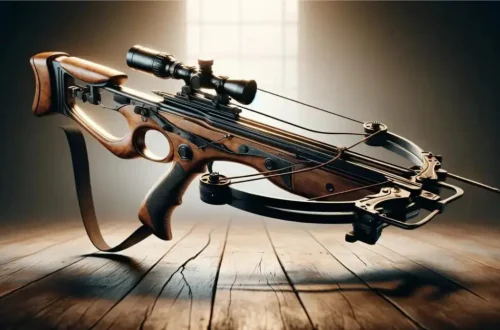
- Crossbow: Although functionally different from handheld bows, crossbows hold a place in modern archery, offering a rifle-like form and function, suitable for both sports and hunting.
Learn more about: Crossbows and Longbows
Archery Arrows
Arrows can be made from various materials such as wood, aluminum, carbon, or a combination of these. The choice of material affects the arrow’s weight, stiffness, and durability.
- Shaft: The long body of the arrow must be the correct stiffness, known as the ‘spine’, to match the draw weight of the bow.
- Fletching: These are the feathers or plastic vanes at the back of the arrow that stabilize its flight.
- Tip: Arrow tips vary in design, from simple target points to specialized broadheads for hunting.
Archery Accessories
Various accessories are available to aid an archer’s technique and accuracy.
- Sights: Improve aim by providing a visual guide for targeting.
- Stabilizers: Attached to the archery bow to reduce movement upon release and increase balance.
- Release Aids: Devices used with compound bows to release the string consistently.
- Quivers: Containers for holding arrows securely.
- Arm Guards and Finger Tabs: Protective gear that shields the archer from string recoil and aids in smooth releases.
Understanding the function and features of each piece of equipment is essential for any archer, whether aiming to compete, hunt, or simply enjoy the sport recreationally.
Finding Your Stance: The Foundation of Effective Shooting
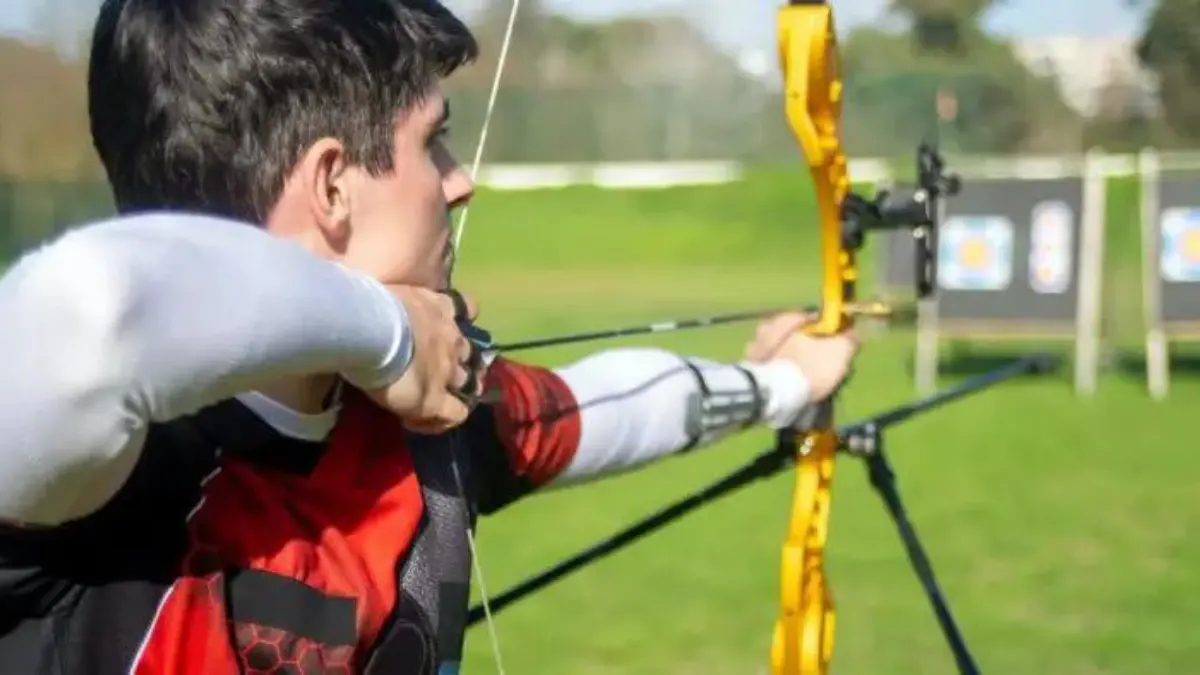
In the world of archery, having a proper stance is as crucial as selecting the right bow. A stable and consistent stance lays the groundwork for accurate shooting by providing the archer with balance and control. When an archer steps onto the shooting line, their feet should be positioned shoulder-width apart, creating a solid base. This stance is not only a matter of comfort but also a key factor in ensuring the body is properly aligned with the target.
The orientation of the feet can vary slightly depending on the archer’s preference, but generally, they should be perpendicular to the shooting line. This is known as the “square stance,” which is commonly recommended for beginners due to its simplicity and ease of alignment. Another option is the “open stance,” where the lead foot is slightly back and angled toward the target, offering more stability and reducing muscle strain for some shooters.
One must also pay attention to the distribution of weight. It should be evenly spread across both feet, allowing the archer to remain steady during the draw and release phases of shooting. A slight forward lean from the waist, maintaining a straight spine, is often suggested to enhance stability further.
Consistency in one’s stance is vital. Each shot should begin with the same footing, as even minor variations can significantly affect accuracy. Archers should practice their stance regularly, making it second nature, thus establishing the strong foundation necessary for effective and precise shooting.
Nocking the Arrow: Proper Placement and Technique
Nocking the arrow is a critical skill for any archer to master, regardless of the type of archery bow they choose. Here are steps and considerations to ensure correct nocking procedure:
- Position the arrow:
- Align the arrow shaft on the arrow rest of the bow.
- Ensure the odd-colored fletch, also known as the index feather, is facing away from the bow. This helps the arrow clear the bow without interference.
- Nock the arrow:
- Locate the small groove called the nock on the tail end of the arrow.
- Gently clip the arrow’s nock onto the bowstring between two small beads, known as nock points. These beads should be set to ensure consistent placement.
- Orientation:
- The nock point helps the archer in consistently placing the arrow at the same vertical position every time.
- The arrow should sit at a 90-degree angle to the bowstring. Deviations may affect the arrow’s flight.
- Finger placement:
- Place fingers around the bowstring in a way that they do not pinch the arrow.
- The most common technique is to use the index finger above the arrow and the middle and ring fingers below.
- Checking the fit:
- A securely nocked arrow should not fall off the string when the bow is turned downward but should remain easy to disengage.
- Draw and anchor:
- When drawing the bowstring back, keep the arrow nocked in place.
- Bring the string consistently to the same anchor point on the face or the archer’s release aid.
Proper nocking technique enhances accuracy, safety, and overall shooting performance. Practice is essential to develop a reliable, instinctive nocking process. Therefore, dedicate time to perfect this foundation skill in archery.
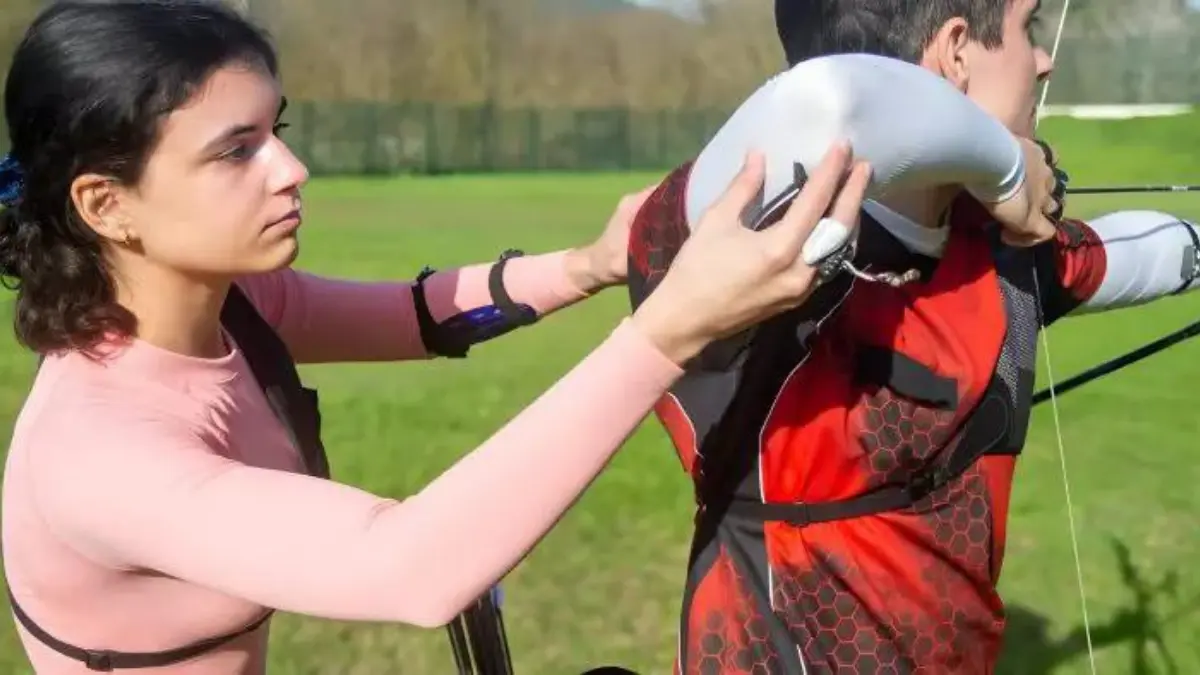
The Archer’s Grip: Holding the Archery Bow Correctly
Properly gripping the bow is vital for accuracy and consistency in archery. It begins with the archer’s stance, relaxed shoulders, and a straight arm extending the bow away from the body. The hand gripping the bow—known as the bow hand—is as crucial as the draw itself. Here is a step-by-step guide to ensure a correct grip:
- Positioning The Hand:
- Place the bow’s grip into the meaty part of the bow hand, in the webbing between the thumb and the index finger.
- The pressure point should lie below the thumb, centered on the grip.
- Thumb and Fingers Placement:
- Curl the fingers lightly around the front of the grip, without applying too much pressure.
- Keep the thumb relaxed and slightly bent, forming a “V” shape.
- Wrist Alignment:
- Align the wrist straight in line with the forearm to avoid torque on the bow, which can affect the arrow’s flight.
- Pressure Point:
- Focus the grip’s pressure point on the part of the hand that will remain consistent through multiple shots. This is usually just below the thumb’s base.
- Relax and Keep Consistent:
- The grip should be firm yet relaxed to prevent shaking and fatigue during long sessions.
- Consistency in grip is key. Even minor changes can significantly affect shot accuracy.
For novice archers, maintaining a proper bow grip may seem unnatural at first. However, with practice, muscle memory will form, leading to an instinctive grasp that optimizes both comfort and control. Coaches and experienced archers often emphasize that a relaxed, consistent grip is an essential foundation of good shooting technique.
Mastering the Draw: Building Strength and Technique
Archery is as much about physical conditioning as it is about the equipment. To effectively wield a bow, one needs to build the specific muscle groups used in drawing and holding a bowstring. Additionally, technical prowess must be honed to ensure accuracy and consistency.
- Developing Strength:
- Essential muscles for archery include those in the back, shoulders, core, and arms.
- Regular strength training should focus on these areas with exercises such as pull-ups, shoulder presses, and rows.
- Resistance bands can simulate the draw motion and help build the necessary muscle memory and strength.
- Archers should start with lighter draw weights and gradually increase as their strength improves.
- Technique Training:
- Proper form is vital. Stand with feet shoulder-width apart, body perpendicular to the target, with a straight, but not rigid, posture.
- Grip should be firm yet relaxed to allow for a smooth release.
- Consistent anchor points on the face or jaw ensure the same draw length and orientation with every shot.
- Practicing the draw motion in front of a mirror can help spot and correct form errors.
- Building Endurance:
- Holding the draw position increases endurance in the specific muscles used in archery.
- Sessions should include exercises for holding the bow at full draw for gradually increasing periods.
- Mental Focus:
- Concentration is key. Techniques such as deep breathing and visualization can improve focus and control during the draw.
- Mimicking competition scenarios during practice helps build confidence and mental resilience.
Following a structured training regimen addressing both strength and technique is critical for mastery. Archers must allow themselves time for gradual improvement, recognizing that both the physical and skill elements are long-term investments in their archery journey.
Aiming Techniques: How to Improve Accuracy
Improving accuracy in archery is critical, and it entails a combination of consistent technique, practice, and the right equipment. Here are methods to polish aiming skills:
- Stance: Archers should maintain a consistent and stable stance. Feet should be shoulder-width apart, body aligned perpendicularly to the target, promoting balance and proper shot execution.
- Grip: Holding the bow correctly is essential. The grip should be firm yet relaxed to prevent torque that can twist the bow and affect the arrow’s flight.
- Anchor Point: Find a consistent anchor point on the face or neck where the hand or string touches at full draw. Consistency in this personal reference point is key to repeatable shots.
- Sight Picture: Practicing “sight picture” helps in aligning the bow sight consistently. The archer should focus on the target while keeping the sight pin steady.
- Breathing: Controlled breathing aids in relaxation and steadiness. Inhale deeply before drawing the bow and exhale partially to settle before release.
- Release Technique: A smooth release is crucial. Develop a technique that allows the fingers to let go of the string cleanly without jerkiness to avoid disturbing the arrow’s path.
- Follow-Through: Continuing the motion after the release, without snapping the hand back, maintains the arrow’s intended trajectory.
- Mental Focus: Archery requires mental strength. The archer must concentrate on the target, blocking out distractions and maintaining focus throughout the shot process.
Regular practice of these techniques, in conjunction with the selection of a bow that fits the archer’s physique and style, will significantly enhance accuracy in archery.
Releasing the Arrow: Timing and Release Methods
When selecting an archery bow, understanding different timing and release methods is pivotal for consistent accuracy. The process of releasing the arrow involves multiple steps that must be executed with precision.
Mechanical Releases
- Wrist Strap Releases: The most popular among hunters, these are attached to the wrist, reducing finger fatigue and providing a consistent release.
- Handheld Releases: Preferred by target archers, these allow for a more direct line of pull, offering enhanced control.
- Back Tension Releases: They are used by advanced archers who want to eliminate the anticipation of the release, relying on muscle memory.
Traditional Releases
- Finger Release: Used with recurve and traditional bows, archers must practice to avoid ‘finger pinch’ and ensure a clean release.
- Thumb Ring: Adopted from historical techniques, the thumb ring protects the thumb during release and can provide a smooth release.
Timing Considerations
Timing the release is crucial for a successful shot. The archer must synchronize their breathing, aim, and the moment of release. A rushed or delayed release can throw off the shot.
Practice and Patience
Regular practice with a chosen release method is essential to develop timing and muscle memory. An archer shouldn’t be afraid to take their time or even step away if they feel they’re not ready to make the shot.
Each release method has its own learning curve, and choosing the one that best fits an individual’s style of shooting is imperative. Whether preferring the tactile sensation of a finger release or the mechanical precision of a wrist strap, an archer must ensure that their bow, release method, and practice regimen work together to create a harmonious shooting experience.
Follow-Through and Analysis: Learning From Each Shot
In archery, as in many precision sports, the follow-through—an archer’s continued focused presence, maintaining form and posture even after the arrow has been released—is as vital as the aim itself. It ensures that each shot is given the best chance of success. For those selecting a bow, observing and analyzing the follow-through can provide a wealth of information about the appropriateness of the bow to the archer’s style and needs.
Selecting Archery Bows
- Selection of an archery bow requires attention to how the equipment complements the shooter’s follow-through.
- Notice the bow’s behavior upon release: does it jump, vibrate excessively, or stay relatively calm? An ideal bow will have minimal hand shock and vibration, contributing to a steady follow-through.
- Evaluate muscle fatigue after several shots. A bow that is too heavy or improperly balanced can disrupt follow-through by straining the archer’s muscles, causing shakiness or inconsistency.
- Consider the arrow’s flight. Erratic flights or a pattern of misses can sometimes be attributed to the bow not matching the archer’s pull style or strength.
Analyze Each Shot
Recording and analyzing each shot can be immensely educational. Archers should look for patterns in their shots to understand better which aspect of bow dynamics is affecting their performance.
- Analyze groupings of arrows on the target. Consistency in the grouping suggests a good match between bow and archer, whereas scattered groupings might suggest a mismatch.
- Pay attention to the feeling of the release. If the release feels jarring or uncomfortable, adjustments to the bow might be necessary.
- Listen to the sound of the bow during the shot. A bow that is too tense or too loose will often make a distinct sound, indicating that further tuning is needed.
Choosing the right bow is a personal journey, one that involves careful consideration, practice, and a willingness to learn from each and every shot. Through diligence in follow-through and analysis, archers can select a bow that not only fits their body but also blends seamlessly with their technique, enhancing their overall archery experience.
Practicing Archery at Home: Simple Drills for Beginners
One can improve archery skills at home using various simple drills. Beginners should initially focus on developing solid form and consistency. Here are some basic exercises to help novices hone their technique:
- Stance Practice:
- Stand with your feet shoulder-width apart.
- Ensure your weight is evenly distributed on both feet.
- Practice aligning your body perpendicular to your imaginary target.
- Bow Drawing Drills:
- Without an arrow, practice drawing your bow to build muscle memory.
- Hold the draw for several seconds while focusing on form.
- Slowly return to the starting position with control.
- Balloon Challenge:
- Inflate a few balloons and attach them to a wall or a board.
- Take aim and practice hitting the balloons with your arrows from a short distance, gradually increasing the distance as you improve.
- Dry Firing Safety:
- Never dry fire your bow (release the bowstring without an arrow) as it can damage your equipment and is unsafe.
- Release Exercises:
- Work on a smooth release by using a bow trainer or a stretch band.
- Focus on letting the string slip out of your fingers or release aid in a controlled manner.
- Aiming Practice:
- Even without releasing an arrow, you can practice aiming.
- Look through your sight at a target and maintain focus, keeping your sight pin steady.
- Strength Building:
- Use exercises like push-ups, pull-ups, and shoulder presses to strengthen the muscles important in archery.
Remember, consistent practice is vital for improving in archery. Beginners can start with these simple drills at home, ensuring they are laying a strong foundation for their archery skills. As one’s form and control improve, more advanced drills and technique refinement can take place, ideally with the guidance of a coach or experienced archer.
Learn more about: Archery Targets and the Best Ones to Select
Troubleshooting Common Beginner Mistakes
When beginners step into the world of archery, they often encounter a few common mistakes while choosing an archery bow. Addressing these can help new archers avoid frustration and set them on the path to a rewarding experience.
Issues With Archery Bow
- Ignoring Draw Length: One of the most critical factors in choosing a bow is ensuring the draw length is right for the archer’s arm span. A draw length that’s too long will affect accuracy and can cause strain, while one too short may limit power and affect form.
- Overestimating Draw Weight: Beginners might overestimate their ability to handle high draw weight bows. Starting with a more manageable draw weight allows for developing proper shooting technique and avoiding muscle strain or injury.
- Neglecting Bow Weight: The physical weight of the bow is equally important. A bow that’s too heavy can cause arm fatigue, which leads to poor form and shooting.
- Not Considering Bow Type: Each type of bow, whether it be a recurve, compound, or longbow, has its own set of characteristics. Beginners should research or seek professional advice on which type fits their intended use and style.
- Disregarding Accessories: Bows require certain accessories, like sights, stabilizers, and arrow rests. Not taking these into account can lead to unexpected additional costs and can affect the bow’s balance and performance.
Other Considerations Selecting an Archery Bow
- Skimping on Quality: While budget is a real concern for beginners, investing in a quality bow can make a significant difference. Cheap bows might seem appealing but can hinder performance and enjoyment.
- Forgetting Personal Comfort: Comfort is subjective, and what works for one archer may not for another. It’s imperative for beginners to handle various bows to see which one feels most natural and comfortable in their hands.
- Overlooking Future Growth: Beginners occasionally choose a bow that suits their immediate needs without considering their potential growth in the sport. Select a bow that allows for progression, especially for children who are still growing.
Addressing these mistakes requires patience, research, and often guidance from experienced archers or instructors. When recognized and corrected early, these common issues can transform challenges into stepping stones for becoming proficient in archery.