DIY Archery Target Projects for the Backyard
Do-it-yourself (DIY) archery combines the ancient art of bowmanship with the modern ethos of personal crafting. Create your own DIY archery target projects. They become involved in every aspect of the sport, fostering a deeper connection with their equipment and skills.
Introduction to DIY Archery and its Benefits
DIY archery projects are not only cost-effective, but also allow for a tailored experience to fit individual practice needs.
The benefits are significant:
- Customization: Tailor targets to specific training goals.
- Cost Savings: Often more economical than purchasing pre-made targets.
- Skill Development: Enhances understanding of archery mechanics.
- Convenience: Practice anytime, right in the backyard.
- Creativity: Engage creatively by designing unique targets. DIY archery is a rewarding endeavor that sharpens both craft and sport.
The Essential Materials You’ll Need for Homemade Targets
When embarking on DIY archery target projects, gathering the right materials is crucial for creating durable and effective targets. Here’s what you’ll need:
- Dense Foam Blocks: Offer great stopping power for arrows and are reusable.
- Cardboard: Stacked densely, it slows arrows efficiently and is cost-effective.
- Old Clothes or Rags: Used as stuffing, they create resistance for arrow penetration.
- Plastic Wrap or Duct Tape: For binding materials together and providing a weather-resistant exterior.
- Wood: Acts as a sturdy frame for your target.
- Marker Pens: To draw target circles or create a grid.
- Carpet or Rubber Mats: Can be layered to add density and stopping power.
- Adhesives or Staples: For securing materials in place within the target structure.
With these materials, one can begin constructing various targets tailored for different archery practices.
Classic Straw Bale Target: Step-by-Step Guide
- Procure Straw Bales: Acquire dense straw bales from a local farm or garden center.
- Stack and Secure: Stack bales to desired height and secure with twine or straps to maintain shape.
- Add Target Faces: Fasten paper targets or mark the bale with a target design using a marker.
- Set a Backstop: Place an old carpet or tarp behind the straw bales to catch any errant arrows.
- Position Target: Place the target at a safe distance in an open area, ensuring there’s ample range for shooting.
- Regular Maintenance: Fluff and rotate the bales as needed to ensure longevity and consistent arrow stopping power.
Cardboard Box Target: Economical and Easy to Make
Creating a DIY archery target from a cardboard box is not only cost-effective but also simple. Follow these steps to craft a practical target:
- Gather a sturdy, large cardboard box.
- Fill the box tightly with plastic bags or shrink wrap to create resistance.
- Seal the box with strong tape to ensure the stuffing stays in place.
- Draw or paint a bullseye or target rings on the front of the box.
- Reinforce the corners and edges with additional tape to maximize durability.
This lightweight target can easily be moved around, making it ideal for backyard practice.
Learn more: Archery Targets: Best Ones for Your Sessions
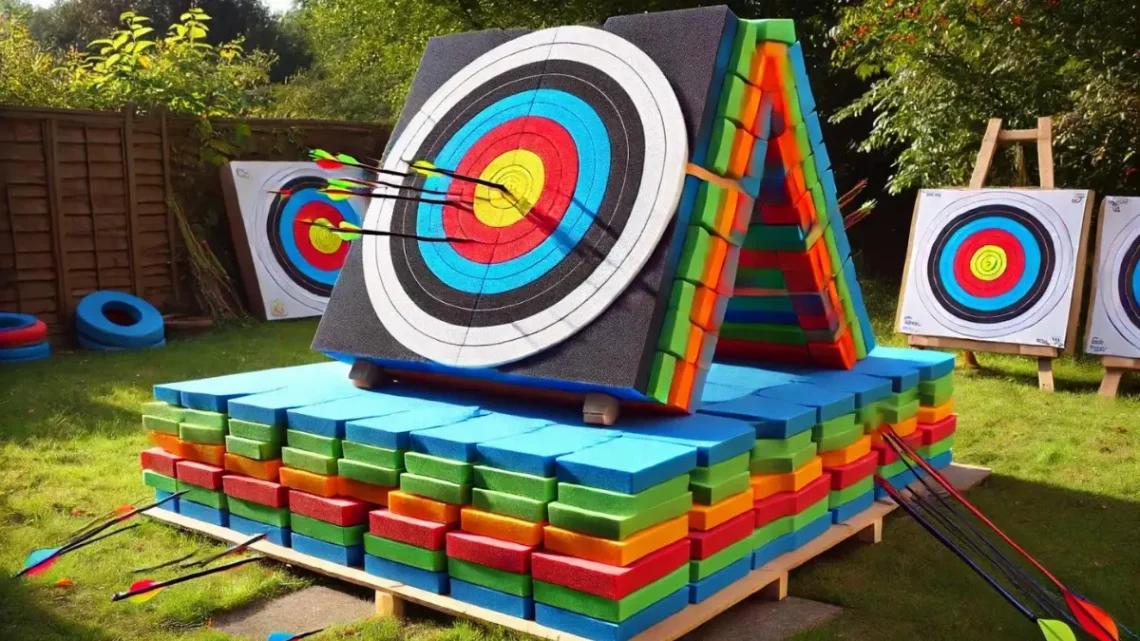
Foam Floor Tiles Target: Lightweight and Durable Design
Foam floor tiles are a versatile DIY option for archery enthusiasts looking to create a lightweight and durable target. These interlocking tiles are easy to assemble and can be configured to any size.
- Materials Needed:
- Interlocking foam floor tiles
- Marker
- Sharp knife or box cutter
- Target face (paper or fabric)
- Adhesive (tape or glue)
- Assembly:
- Lay tiles flat and piece together to desired thickness.
- Trace circular targets onto the front tile.
- Cut along the traced lines through the layers.
- Attach a target face with adhesive on the front.
- Benefits:
- These tiles are water-resistant and absorbent, making them ideal for withstanding arrow impacts.
- Lightweight design allows for easy transport and setup.
- Tiles can be replaced individually, offering cost-effective maintenance.
Old Clothes and Fabric Target: Recycling at its Finest
Archery enthusiasts can turn unwanted textiles into a durable target. Start by collecting old clothes, towels, and fabric scraps. These materials offer excellent stopping power for arrows without causing significant damage. Compress the textiles tightly into a box or homemade frame to create the density needed for an effective target. Layers of fabric will cushion the arrow’s impact, making retrieval easier and extending the target’s life. This eco-friendly project transforms clutter into a functional practice tool, exemplifying recycling at its best.
Layered Foam Target: Customizable for Different Arrow Types
Creating a layered foam target allows archers to customize the density and resistance based on the arrow types they use. This target can accommodate both field tips and broadheads, making it versatile for different practice scenarios.
- Materials Required:
- Several dense foam layers
- Duct tape or glue
- Wooden frame (optional)
- Constructing the Target:
- Stack the foam layers, alternating in density for varied resistance.
- Secure the layers together with duct tape or adhesive to prevent movement.
- Optionally, encase the layered foam block within a wooden frame for added stability and shape.
- Usage Tips:
- Lighter foam for field tips
- Denser foam for heavier, broadhead arrows
This customized approach ensures longevity and appropriateness of the target for all arrow types. Adjust the layers as needed for optimal arrow stopping power.
Ensuring Safety Around Your DIY Archery Target
When constructing a DIY archery range, safety must be the top priority. To minimize risks, consider these guidelines:
- Designate a Clear Shooting Area: Ensure the shooting direction is away from people and property, with a secure backdrop to catch stray arrows.
- Set Boundaries: Clearly mark the shooting line and establish a safe distance behind the archer where spectators and non-shooters must remain.
- Inspect Equipment Regularly: Check bows, arrows, and targets for damage before use to prevent accidents.
- Use Proper Signage: Display warning signs around the perimeter to alert passersby of the archery activity.
- Implement Safety Rules: Enforce rules such as “no dry firing” (releasing the bowstring without an arrow) and using arm guards and finger protection.
- Familiarize First Aid: Keep a first aid kit nearby and be knowledgeable of basic procedures in case of injury.
By adhering to these safety measures, archers can enjoy their DIY range responsibly.
Learn more: Essential Archery Safety Rules to Know
Maintaining and Repairing Your DIY Targets for Longevity
To ensure that your DIY archery targets last as long as possible, regular maintenance and repairs are key. Here are some tips to help:
- Regular Inspection: Check your targets before and after use for signs of wear or damage.
- Patch Up Holes: For foam and bag targets, use adhesive patches or foam inserts to fill in any holes created by arrows.
- Tighten Stuffing: If you’re using a stuffed fabric target, redistribute and pack the stuffing tightly on a regular basis to maintain its shape and effectiveness.
- Replace Covers: For bag targets, have a spare cover on hand to replace the old one when it becomes too worn.
- Prevent Moisture Damage: Keep your targets dry and store them in a cool, shaded area to prevent mold and rot.
- Rotate Targets: Regularly rotate your targets to ensure even wear on all sides.
- Sun Protection: If the target is frequently in the sun, consider applying a UV protectant spray to prevent material breakdown.
Routine care can significantly extend the lifespan of your homemade archery targets, maximizing your practice time.
Environmentally Friendly Archery: Tips for Sustainable Practices
Archers can adopt several sustainable practices to ensure their sport does not harm the environment:
- Use Biodegradable Materials: Opt for targets constructed from natural, biodegradable materials like straw or compressed cotton.
- Recycle and Reuse: Recycle old targets or repurpose materials around the home to create new ones.
- Eco-Friendly Arrows: Choose arrows made from sustainable woods or materials that can be recycled.
- Maintain Equipment: Regularly maintain your bows and arrows to extend their lifespan, reducing waste.
- Natural Backstops: For backstops, use earth berms or densely packed plant matter that can absorb arrow shots and blend into natural settings.
Showcasing Your Homemade Targets: Adding Personal Touches
Once your DIY archery targets are complete, personalization is key to making them uniquely yours. Consider the following ideas to add character:
- Paint designs or bullseyes with bright colors for visibility and flair.
- Add stenciled numbers or letters to create scoring zones, enhancing practice sessions.
- Attach a durable fabric handle for transport, embroidering your initials or a special emblem.
- Seal your targets with weatherproofing spray to protect against the elements and showcase your craftsmanship longevity.
- Set up a display area in your backyard where your targets can be both used and admired, showcasing the dual aspects of functionality and expression.
Conclusion: Getting the Most Out of Your Backyard DIY Archery Target
To maximize the benefits of backyard archery practice, consistency is key. Regular sessions with your DIY targets improve accuracy and build muscle memory. Safety should always be a priority; ensure the practice area is secure and never shoot towards people or property. Incorporate a variety of shots by adjusting distances and angles, simulating realistic scenarios. Track progress to maintain motivation and set goals. Always be mindful of local regulations. With dedication and smart practice, you will become a proficient archer right in your own backyard.